Showing posts with label How To. Show all posts

January 10, 2018

Json Parsing With Python

18:26 Posted by Freblogg , , , , , No comments

JSON has become an ubiquitous data exchange format everywhere. Pretty much every service has a JSON API. And since it is so popular, most of the programming languages have built-in JSON parsers. And Of course, Python is no exception. In this article, I'll show you how you can parse JSON with Python's json library.

Python Logo

JSON parsing in Python is quite straight forward and easy unlike in some languages, where it is unnecessarily cumbersome. Like everything else in Python, You start by importing the library you want.

import json

In this article, I am going to use the following JSON I got from json.org

{
  "menu": {
    "id": "file",
    "value": "File",
    "popup": {
      "menuitem": [
        {"value": "New", "onclick": "CreateNewDoc()"},
        {"value": "Open", "onclick": "OpenDoc()"},
        {"value": "Close", "onclick": "CloseDoc()"}
      ]
    }
  }
}

We have got a good set of dictionaries and arrays to work with in this data. If you want to follow along, you can use the same JSON or you can use anything else as well.

The first thing to do is to get this json string into a variable.

json_string = """{"menu": {
  "id": "file",
  "value": "File",
  "popup": {
    "menuitem": [
      {"value": "New", "onclick": "CreateNewDoc()"},
      {"value": "Open", "onclick": "OpenDoc()"},
      {"value": "Close", "onclick": "CloseDoc()"}
    ]
  }
}}"""

And now we parse this string into a dictionary object with the help of the json library's loads() method.

json_dict = json.loads(json_string)

And you're done. The JSON is parsed and is stored in the json_dict object. The json_dict here is a python dictionary object. If you want to verify, you can do that by calling the type() on it with

print(type(json_dict))

And it will show that it is <class 'dict'>.

Getting back, We have the entire json object as a dictionary in json_dict object and you can just drill down into the dictionary with the keys. On the top level, We just have one key in the dictionary which is menu. We get can get that by indexing the dictionary with that key.

menu = json_dict['menu']

And of course menu is a dictionary too with the keys id, value, and popup. We can access them and print them as well.

print(menu['id'])            ## => 'file'
print(menu['value'])         ## => 'File'

And then finally we've got popup which is another dictionary as well with the key menuitem which is a list. We can verify this by checking the types of these objects.

popup = menu['popup']
print(type(popup))           ## => <class 'dict'>

menuitem = popup['menuitem']
print(type(menuitem))        ## => <class 'list'>

And Since menuitem is a list, we can iterate on it and print the values.

for item in menuitem:
    print(item)

And the output is

{'value': 'New', 'onclick': 'CreateNewDoc()'}
{'value': 'Open', 'onclick': 'OpenDoc()'}
{'value': 'Close', 'onclick': 'CloseDoc()'}

And of course each of these elements are dictionaries and so you can go further inside and access those keys and values.

For example, If you want to access New from the above output, you can do this:

print(menuitem[0]['value'])  ## => New

And so on and so forth to get any value in the JSON.

And not only that, json library can also accept JSON responses from web services. One cool thing here is that, web server responses are byte strings which means that if you want to use them in your program you'd have convert them to regular strings by using the decode() method. But for json you don't have to do that. You can directly feed in the byte string and it will give you a parsed object. That's pretty cool!

That is all for this article.


For more programming articles, checkout Freblogg Freblogg/Python

Some articles on automation:

Web Scraping For Beginners with Python

My semi automated workflow for blogging

Publish articles to Blogger automatically

Publish articles to Medium automatically


This is the 19th article as part of my twitter challenge #30DaysOfBlogging. Eleven more articles on various topics, including but not limited to, Java, Git, Vim, Software Development, Python, to come.

If you are interested in this, make sure to follow me on Twitter @durgaswaroop. While you're at it, Go ahead and subscribe on medium and my blog as well.


If you are interested in contributing to any open source projects and haven't found the right project or if you were unsure on how to begin, I would like to suggest my own project, Delorean which is a Distributed Version control system, built from scratch in scala. You can contribute not only in the form of code, but also with usage documentation and also by identifying any bugs in its functionality.


Thanks for reading. See you again in the next article.

January 02, 2018

Datasets In Apache Spark | Part 2

In the two last tutorials we have covered what Apache Spark is and also got ourselves familiar with Datasets in Apache Spark, which is the primary data abstraction in Spark. In this tutorial we will see how to read a data file as a parametrized Bean object Dataset using Encoders.

Spark Image Logo 

This tutorial is going to be short, but this is very important as you would find yourself doing this frequently. In the last article you've seen how to read a CSV or JSON file as a Dataset. You might have noticed that we were using Dataset<Row> for everything. If you're not familiar with Generics in Java, Dataset<Row> can be thought of as a Dataset consisting of Row objects. The Row object is a spark sql class and is the default when creating a Dataset.

Although the Row class has some useful methods, as a generic object suitable for all types, it is not suitable for everything. Since Datasets usually store data that usually corresponds to a Bean class, it is better to create a Dataset of that bean class instead of Row. With this, you'll have access to all your usual getters and setters of the bean class. That's what We'll do in this article. We'll create a Dataset of POJO's instead of Row objects.

I'm using the same fake-people.csv file that I used in the last article that looks like this:

id,first_name,last_name,email,gender,ip_address
1,Netti,McKirdy,nmckirdy0@slideshare.net,Female,148.3.248.193
2,Nickey,Curreen,ncurreen1@tripadvisor.com,Male,206.9.48.216
3,Allayne,Chatainier,achatainier2@trellian.com,Male,191.118.4.217
...

To represent this data, I've created a POJO called FakePeople.java, which looks like this:

import lombok.Data;
public @Data class FakePeople {
    final int id;
    final private String firstName;
    final private String lastName;
    final private String email;
    final private String gender;
    final private String ipAddress;
}

I'm using Project Lombok here, to generate the required Getters, Setters and other POJO methods. (If you don't know about Lombok, you should definitely check that out. It is quite handy).

We have our POJO now, Let's get a parametrized Dataset. To achieve this we first need to create an Encoder. We do that for the FakePeople class as following:

Encoder<FakePeople> fakePeopleEncoder = Encoders.bean(FakePeople.class);

This will register our encoder which will help us parse our CSV data.

Of course we need our spark session variable as well.

// Initialize Sparksession
SparkSession spark = SparkSession.builder().appName("Freblogg-Spark").master("local").getOrCreate();

Now we can go ahead and read the CSV file, very much like the way we did before with just one addition.

// Without Encoder
Dataset<Row> people = spark.read().option("header", "true").csv("fake-people.csv");

// With Encoder
Dataset<FakePeople> people = spark.read().option("header", "true").csv("fake-people.csv").as(fakePeopleEncoder);

And the output of people.show(5) is the same as what you'd expect.

+---+----------+----------+--------------------+------+--------------+
| id|first_name| last_name|               email|gender|    ip_address|
+---+----------+----------+--------------------+------+--------------+
|  1|     Netti|   McKirdy|nmckirdy0@slidesh...|Female| 148.3.248.193|
|  2|    Nickey|   Curreen|ncurreen1@tripadv...|  Male|  206.9.48.216|
|  3|   Allayne|Chatainier|achatainier2@trel...|  Male| 191.118.4.217|
|  4|     Tades|    Emmett|temmett3@barnesan...|  Male|153.113.87.195|
|  5|     Shawn|    McGenn|smcgenn4@shop-pro.jp|  Male|  247.45.80.68|
+---+----------+----------+--------------------+------+--------------+

As you can see the only difference in creating the Dataset is .as(fakePeopleEncoder) and that gets us Dataset<FakePeople> instead of Dataset<Row>. And with that, we now have access to all the getters, setters of FakePeople class which we wouldn't otherwise have with a Row object. We'll explore more about how this is useful in a future tutorial.

For more information on Datasets: Spark SQL, DataFrames and Datasets Guide

That is all for this article.


For more programming articles, checkout Freblogg, Freblogg/Java, Freblogg/Spark

Apache Spark articles:

Word count with Apache Spark and Java

Datasets in Apache Spark | Part 1

Datasets in Apache Spark | Part 2


This is the 11th article as part of my twitter challenge #31DaysOfBlogging. Nineteen more articles on various topics, including but not limited to, Java, Git, Vim, Software Development, Python, to come.

If you are interested in this, make sure to follow me on Twitter @durgaswaroop. While you're at it, Go ahead and subscribe here on medium and my other blog as well.


If you are interested in contributing to any open source projects and haven't found the right project or if you were unsure on how to begin, I would like to suggest my own project, Delorean which is a Distributed Version control system, built from scratch in scala. You can contribute not only in the form of code, but also with usage documentation and also by identifying any bugs in its functionality.


Thanks for reading. See you again in the next article.

December 31, 2017

My Almost Fully Automated Blogging Workflow

12:37 Posted by Freblogg , , , , , , , 2 comments

In the article My semi automated workflow for blogging, I have outlined what my blogging process is like and how I've started to automate it. Ofcourse, at the time of that article, the process was still in early stages and I hadn't automated everything I do. And, that's where this article comes in. This is the second attempt at automating my entire Blogging workflow.

Medium blogger python logo

Just to give you some context, here are the things that I do when I'm blogging.

  1. Open a markdown file in Vim with the title of the article as the name along with some template text
  2. Open a browser with the html of the newly created markdown file
  3. Convert markdown to html with pandoc several times during the writing process
  4. Once the article is done and html is produced, edit the html to make some changes specific based on whether I'm publishing on Medium or if I'm publishing on Blogger
  5. Read the tags/labels and other attributes from the file and Publish the code as draft on Medium or Blogger.
  6. Once it looks good, Schedule or Publish it (This is a manual process. There's no denying it.)
  7. Finally tweet about the post with the link to the article

I have the individual pieces of this process ready. I have already written about them in the following articles.

Semi Automated Blogging Workflow

Publish Articles To Blogger In One Second

Publish Articles To Medium In One Second

Tweeting With Python & Tweepy

Now, since the individual pieces are ready, it might seem that everything is done. But, as it turns out (unsurprisingly), the integration is of-course a big deal and took a lot more effort than I was expecting. And I am documenting that in this article along with the complete flow.

It starts with the script blog-it which opens vim for me, opens chrome and also sets up a process for converting markdown to html, continuously.

That script calls blog.py which is what opens the vim along with the default text template. I would like to put the complete gist here, but it is just too long and so instead I'm showing the meat of the script.

article_title = title.replace("_", " ").title()

# Create the markdown file and add the title
f = open(md_file, "w+")
f.write(generate_comments_header(article_title))
f.write(article_title)  # Replace underscores and title case it
f.write("\n")
f.write("-" * len(title))
f.write("\n")
f.write(generate_footer_text())
f.close()

# Now, create the html file
html_file = title + ".html"
open(html_file, "w").close()

# Start vim with the markdown file open on line #10
subprocess.run(['C:/Program Files (x86)/Vim/vim80/gvim.exe', '+10', md_file])

Then comes m2h which continuously converts markdown to html.

This ends one flow. Next comes, publishing. I have broken this down because publishing is a manual process for me unless I can complete the entire article in one sitting, which is never going to be possible. So, Once I'm doing with writing it, I'll start the publishing.

I'll run publish.py which depending on the comments in the html publishes it to either Blogger or Medium. Again, I'm only showing a part of it. The full gist is available here.

with open(html_file) as file:
    html_file_contents = file.read()

re_comments = re.compile('\s*<!--(.*)-->', re.DOTALL)
comments_text = re_comments.search(html_file_contents).group(1).strip()
comments_parser = CommentParser.parse_comments(comments_text)

if comments_parser.destination.lower() == 'blogger':
    blogger_publish.publish(html_file, comments_parser.title, comments_parser.labels, comments_parser.post_id)
elif comments_parser.destination.lower() == 'medium':
    medium_publish.publish(html_file, comments_parser.title, comments_parser.labels)
else:
    print(
        'Unknown destination: ' + comments_parser.destination + '. Supported destinations are Blogger and Medium.')

Then comes the individual publishing scripts that publish to blogger and medium.

For blogger-publish.py (Gist here), I do any required modifications with blogger_modifications.py (Gist here) which converts some tags as expected my blogger page.

Then for medium-publish.py (Gist here), I take the parameters and publish to blogger as html. No, modifications needed to be done here.

access_token_file = '~/.medium-access-token'
expanded_path = os.path.expanduser(access_token_file)
with open(expanded_path) as file:
  access_token = file.read().strip()

headers = get_headers(access_token)
user_url = get_user_url(headers)

# Publish new post
posts_url = user_url + 'posts/'
payload = generate_payload(title, labels, html_file)
response = requests.request('POST', posts_url, data=payload, headers=headers)

Actually this publishing does send it to the site as a draft instead of actually publishing it. This is a step that I don't know how to automate as I have to manually take a look at how the article looks in preview. May be I should try doing this with selenium or something like that.

Once, I've verified that the post looks good, I will publish it and take the URL of the published article and call the tweeter.py (Gist here) which then opens a Vim file with some default text for title, and URL already filled in along with some hashtags. I'll complete the tweet and once, I close it, It gets published on Twitter.

And that completes the process. Obviously there are still a couple of manual steps. Although I can't eliminate all of them, I might be able to minimize them as well. But, so far it looks pretty good especially with just the little effort I've put into this in just one week. Of course, I'll keep on tuning it as needed to make it even better and may be I'll publish one final article for that.

That is all for this article.


For more programming articles, checkout Freblogg, Freblogg/Python

Some articles on automation:

Web Scraping For Beginners with Python My semi automated workflow for blogging Publish articles to Blogger automatically Publish articles to Medium automatically


This is the 9th article as part of my twitter challenge #30DaysOfBlogging. Twenty one more articles on various topics, including but not limited to, Java, Git, Vim, Software Development, Python, to come.

If you are interested in this, make sure to follow me on Twitter @durgaswaroop. While you're at it, Go ahead and subscribe here on medium and my other blog as well.


If you are interested in contributing to any open source projects and haven't found the right project or if you were unsure on how to begin, I would like to suggest my own project, Delorean which is a Distributed Version control system, built from scratch in scala. You can contribute not only in the form of code, but also with usage documentation and also by identifying any bugs in its functionality.


Thanks for reading. See you again in the next article.

December 29, 2017

Publish Articles To Your Medium Blog In One Second With Integration Tokens

14:27 Posted by Freblogg , , , , 2 comments

In my article My semi automated workflow for blogging, I have talked about my blogging workflow. There were two main things (actually one thing) in that flow that were not automated. i.e., automatically Uploading to Blogger and automatically Uploading to Medium. I have talked about the first one here. This article is about uploading posts to Medium automatically.

Medium Logo 

Developer documentation for Medium is a breath of fresh air after the mess that is Google API’s. Of course, Google API’s are complex because they have so many different services, but they could’ve done a better job at organizing all that stuff. Anyway, Let’s see how you can use Medium API’s.

Setting Up

We don’t really need any specific dependencies for what we’re doing in this article. You can do everything with urllib which is already part of the python standard library. I’ll be using requests as well to make it a bit more simpler but you can achieve the same without it.

Getting the access token

To authenticate yourself with Medium, you need to get an access token that you’ll pass along to every request. There are two ways to get that token.

  1. Browser-based authentication
  2. Self-issues access tokens

Which one you should go with, depends on what kind of application you’re trying to build. As you can probably guess based on the title, we’ll be covering the second method in this article. The first method needs an authentication server setup which can accept callback from Medium. But, since at this moment, I don’t have that setup, I’m going with the second option.

The Self-issued access tokens method is quite easy to work with as you directly take the access token without having to have the user authenticate via the browser.

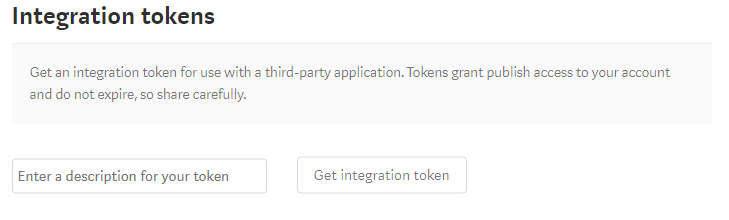
To get the access token, Go to Profile Settings and scroll down till you see Integration tokens section.

Medium Integration tokens 

There enter some description for what you’re going to use this token and click on Get integration token. Copy that generated token which looks something like 181d415f34379af07b2c11d144dfbe35d and save it some where to be used in your program.

Using Access token to access Medium

Once you have the access token, you’ll use that token as your password and send it along with every request to get the required data.

Let’s get started then. As, I’ve said we’ll be using requests library for url connections. We’ll also be using the json libary for parsing the responses. So, Let’s import them.

import requests
import json

Then use access_token you’ve got and put it in a headers dictionary.

access_token = '181d415f34379af07b2c11d144dfbe35d'
headers = {
    'Authorization': "Bearer " + access_token,
    'User-Agent': 'Mozilla/5.0 (Windows NT 6.3; Win64; x64) AppleWebKit/537.36 (KHTML, like Gecko) Chrome/63.0.3239.84 Safari/537.36'
}

The User-Agent in the above dictionary is required as Medium won’t accept your request otherwise. You don’t have to have the same value as I did.

Validating the access token

First thing to check is if the access_token is valid. You can do that by making a GET request to https://api.medium.com/v1/me and checking the response.

me_url = base_url + 'me'
me_req = ureq.Request(me_url, headers=headers)
me_response = ureq.urlopen(me_req).read()
json_me_response = json.loads(me_response)
print(json_me_response)

And, when I print the json_me_response, which is a json object, I get the following:

{
"data": {
  "id":"5303d74c64f66366f00cb9b2a94f3251bf5adskak7623as",
  "username":"durgaswaroop", 
  "name":"Durga swaroop Perla", 
  "url":"https://medium.com/@durgaswaroop",
  "imageUrl":"https://cdn-images-1.medium.com/fit/c/400/400/0*qVDXEHT9DDYUOcrj."
  }
}

If we got that response like above, then we know that the access token we have is valid.

From there, I extract, the user_id from the JSON string, with

user_id = json_me_response['data']['id']

Get User’s Publications

From the above request, we’ve validated that the access token is correct and we also have got the user_id. Using that we can get access to the publications of a user. For that, we’ve to make a GET to https://api.medium.com/v1/users/{{userId}}/publications and you’ll see the list of the publications by that user.

user_url = base_url + 'users/' + user_id
publications_url = user_url + 'publications/'
publications_req = ureq.Request(publications_url, headers=headers)
publications_response = ureq.urlopen(publications_req).read()
print(publications_response)  

I don’t have any publications on my medium account, and so I got an empty array as response. But, if you have some publications, the response will be something like this.

{
  "data": [
    {
      "id": "b969ac62a46b",
      "name": "About Medium",
      "description": "What is this thing and how does it work?",
      "url": "https://medium.com/about",
      "imageUrl": "https://cdn-images-1.medium.com/fit/c/200/200/0*ae1jbP_od0W6EulE.jpeg"
    },
    {
      "id": "b45573563f5a",
      "name": "Developers",
      "description": "Medium’s Developer resources",
      "url": "https://medium.com/developers",
      "imageUrl": "https://cdn-images-1.medium.com/fit/c/200/200/1*ccokMT4VXmDDO1EoQQHkzg@2x.png"
    }
  ]
}

Now, one weird thing about Medium’s API is that they don’t have a GET for posts. From the API’s we can get a list of all the publications but you can’t get a user’s posts. You can only publish a new post. Although, it is odd for that to be missing, It is not something I’m looking for anyway, as I am only interested in publishing an article. But if you need that, you probably should check to see if there are any hacky ways of achieving the same (at your own volition).

Create a New Post

To create a new post, we have to make a POST request to https://api.medium.com/v1/users/{{authorId}}/posts. The authorId here would be the same as the userId of the user whose access-token you have.

I’m using requests library for this as making a POST request becomes easy with it. Of course, first you need to create a payload to be uploaded. The payload should look something like the following, as described here

{
  "title": "Liverpool FC",
  "contentFormat": "html",
  "content": "<h1>Liverpool FC</h1><p>You’ll never walk alone.</p>",
  "tags": ["football", "sport", "Liverpool"],
  "publishStatus": "public"
}

So, for this, I did the following:

posts_url = user_url + 'posts/'

payload = {
    'title': 'Medium Test Post',
    'contentFormat': 'markdown',
    'tags': ['medium', 'test', 'python'],
    'publishStatus': 'draft',
    'content': open('7.Test_post.md').read()
}

response = requests.request('POST', posts_url, data=payload, headers=headers)
print(response.text)

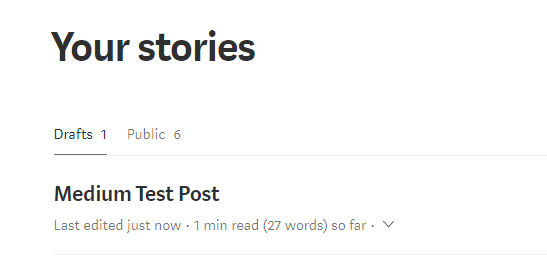
As you see, for contentFormat, I’ve set markdown and for content I read it straight from the file. I didn’t want to publish this as it is just a dummy post and so I’ve set the publishStatus to draft. And sure enough, it works as expected and I can see this draft added on my account.

Draft post 

Do note that the title in the payload object won’t actually be the title of the article. If you want to have a title, you add it in the content itself as a <h*> tag.

The full code is available as a gist.

That is all for this article.


For more programming and Python articles, checkout Freblogg and Freblogg/Python

Some articles on automation:

Web Scraping For Beginners with Python

My semi automated workflow for blogging


This is the seventh article as part of my twitter challenge #30DaysOfBlogging. Twenty-three more articles on various topics including but not limited to Java, Git, Vim, Software Development, Python, to come.

If you are interested in this, make sure to follow me on Twitter @durgaswaroop. While you’re at it, Go ahead and subscribe to this blog and my blog on Medium as well.


If you are interested in contributing to any open source projects and haven’t found the right project or if you were unsure on how to begin, I would like to suggest my own project, Delorean which is a Distributed Version control system, built from scratch in scala. You can contribute not only in the form of code, but also with usage documentation and also by identifying any bugs in the functionality.


Thanks for reading. See you again in the next article.

December 27, 2017

Datasets in Apache Spark | Part 1

In my previous post I have talked about Apache Spark. We have also built an application for counting the number of words in a file, which is the hello world equivalent of the big data world.

Apache spark Java Logo’s

It has been over 18 months since that article and spark has changed quite a lot in this time. A new major release of spark, which is spark-2.0 came out and now the latest version is 2.2.1. And with a new version comes new API’s and improvements. In-fact the first thing you’ll probably notice is that, you don’t need to create SparkContext or JavaSparkContext objects anymore. The various context and configurations have been put together into a new class SparkSession. You can still access the SparkContext or the SqlContext from the SparkSession object itself. So, you’ll be starting your programs with this now:

SparkSession spark = SparkSession.builder().appName("Freblogg-Spark").master("local").getOrCreate();

And you can use this spark variable the way you’d use other context variables.

Another change in Spark 2.0 is that, there is a heavy emphasis on the usage of Dataset API’s, and for a good reason. Datasets are more performant and memory efficient than RDD’s. RDD (Resilient Distributed Datasets) have been pushed to second place now. You can still use RDD’s if you want but Datasets are the preferred API. In fact, datasets have some nice convenience methods that we can use them for even unstructured data like text as well. Let’s generate some cool lipsum from Malevole. It looks something like this:

Ulysses, Ulysses - Soaring through all the galaxies. In search of Earth, flying in to the night. Ulysses, Ulysses - Fighting evil 
and tyranny, with all his power, and with all of his might. Ulysses - no-one else can do the things you do. Ulysses - like a bolt of
thunder from the blue. Ulysses - always fighting all the evil forces bringing peace and justice to all....

Now, you might try to use an RDD to read this, but let’s see what we can do with Datasets.

Dataset<String> lipsumDs = spark.read().textFile("fake-text.txt");
lipsumDs.show(5);

Here we are reading the text file using the spark object we created earlier and that gives us a Dataset<String> lipsumDs. The show() method on the dataset object prints the dataset. And we get the following output:

+--------------------+
|               value|
+--------------------+
|Ulysses, Ulysses ...|
|Ulysses, Ulysses ...|
| no-one else can ...|
|  always fighting...|
|                    |
+--------------------+

What we see here are the lines of the text file. Each line in the file is now a row in the Dataset. There are now a rich set of functions available to you in Datasets which weren’t in RDD’s. You can do filters on the rows for certain words, do a count on the table, perform groupBy operations, etc all like you would on a Database table. For a full list of all the available operations on Dataset, read this: Dataset: Spark Documentation.

I hope that’s enough talk about unstructured data analysis. Let’s get to the main focus of this article, which is using Datasets for structured data. More specifically, csv and json. For this tutorial, I am using the data created from Mockaroo, an online data generator. I’ve created 1000 csv records that look like this:

id,first_name,last_name,email,gender,ip_address
1,Netti,McKirdy,nmckirdy0@slideshare.net,Female,148.3.248.193
2,Nickey,Curreen,ncurreen1@tripadvisor.com,Male,206.9.48.216
3,Allayne,Chatainier,achatainier2@trellian.com,Male,191.118.4.217
4,Tades,Emmett,temmett3@barnesandnoble.com,Male,153.113.87.195
5,Shawn,McGenn,smcgenn4@shop-pro.jp,Male,247.45.80.68
6,Giuseppe,Scobbie,gscobbie5@twitter.com,Male,123.114.131.200
...

We’ll use this data, which I’ve put in a file named fake-people.csv, to work with Datasets. Let’s create a Dataset out of this csv data.

Dataset<Row> peopleDs = spark.read().option("header", "true").csv("fake-people.csv");
peopleDs.show(5);

Since we’ve column headers in our data, we add the .option("header", "true") and the output is a nicely formatted table of the data with all the columns like this:


+---+----------+----------+--------------------+------+--------------+
| id|first_name| last_name|               email|gender|    ip_address|
+---+----------+----------+--------------------+------+--------------+
|  1|     Netti|   McKirdy|nmckirdy0@slidesh...|Female| 148.3.248.193|
|  2|    Nickey|   Curreen|ncurreen1@tripadv...|  Male|  206.9.48.216|
|  3|   Allayne|Chatainier|achatainier2@trel...|  Male| 191.118.4.217|
|  4|     Tades|    Emmett|temmett3@barnesan...|  Male|153.113.87.195|
|  5|     Shawn|    McGenn|smcgenn4@shop-pro.jp|  Male|  247.45.80.68|
+---+----------+----------+--------------------+------+--------------+

You can read in json data similarly as well. So, I generated some json this time from mockaroo.

{"id":1,"first_name":"Zenia","last_name":"Joberne","email":"zjoberne0@foxnews.com","gender":"Female","ip_address":"214.207.159.43"}
{"id":2,"first_name":"Renard","last_name":"Kezor","email":"rkezor1@elpais.com","gender":"Male","ip_address":"199.3.18.104"}
{"id":3,"first_name":"Briant","last_name":"Patel","email":"bpatel2@odnoklassniki.ru","gender":"Male","ip_address":"111.184.217.23"}
{"id":4,"first_name":"Robinett","last_name":"Heasley","email":"rheasley3@tiny.cc","gender":"Female","ip_address":"21.40.190.226"}
{"id":5,"first_name":"Rosalinda","last_name":"Glandfield","email":"rglandfield4@indiegogo.com","gender":"Female","ip_address":"26.16.4.132"}
{"id":6,"first_name":"Haslett","last_name":"Culligan","email":"hculligan5@meetup.com","gender":"Male","ip_address":"201.191.72.10"}
....

Note: Spark can read json only of this format where we have one object per row. Otherwise you will see _corrupt_record when you print your dataset. That’s your cue to make sure the json is formatted as per spark’s need.

And you read json very similar to the way you read csv. Since in json we don’t have headers, we don’t need the header option.

Dataset<Row> peopleJsonDs = spark.read().json("fake-people.json");
peopleJsonDs.show(5);

And the output is,

+--------------------+----------+------+---+--------------+---------+
|               email|first_name|gender| id|    ip_address|last_name|
+--------------------+----------+------+---+--------------+---------+
|psurgison0@istock...|   Prissie|Female|  1| 48.151.89.171| Surgison|
| rsewell1@jalbum.net|    Robena|Female|  2| 184.16.37.210|   Sewell|
|aluxon2@list-mana...| Annamarie|Female|  3| 254.69.187.23|    Luxon|
|sodoherty3@twitpi...|   Shannah|Female|  4| 0.245.101.197|O'Doherty|
| alodford4@jigsy.com|     Alice|Female|  5|70.217.170.182|  Lodford|
+--------------------+----------+------+---+--------------+---------+

You can see the order of columns is jumbled. This is because JSON data doesn’t usually keep any specified order and so, when you read JSON data into a dataset, the order might not be same as what you’ve given. Of course if you want to display the columns in a particular order, you can always do a select operation.

peopleJsonDs.select("id", "first_name", "last_name", "email", "gender", "ip_address").show(5);

And that would print it in the right order. This is exactly like the SELECT query in SQL, if you’re familiar with it.

Now, that we have seen how to create Datasets, let’s see some of the operations we can perform on them.

Operations on Datasets

Datasets are built on top of Dataframes. So, if you’re already familiar with Dataframes in the spark 1.x releases you already know a ton about Datasets. Some of the operations you can perform on Dataset are as follows:

Column selection

Select one or more columns from the dataset.
peopleDs.select("email").show(5); // Selecting one column
peopleDs.select(col("email"), col("gender")).show(5); // Selecting multiple columns

Note: col is a static import of org.apache.spark.sql.functions.col;

Filtering on columns

Filter a subset of rows in the dataset based on conditions.
// Filter rows with id > 5 and \<= 10
peopleDs.filter(col("id").$less$eq(10).and(col("id").$greater(5))).show();

Dropping columns

Remove one or more columns from the dataset
peopleDs.drop("last_name", "ip_address").show(5);

Sorting on columns

peopleDs.sort(desc("first_name")).show(5);

And that sorts the dataset in the reverse order of the column first_name.

Output:

+---+----------+---------+--------------------+------+-------------+
| id|first_name|last_name|               email|gender|   ip_address|
+---+----------+---------+--------------------+------+-------------+
|685|  Zedekiah|  Brockie|zbrockiej0@mozill...|  Male|105.119.18.98|
|308|     Zarla| Bryceson|zbryceson8j@redif...|Female|55.118.168.15|
|636|  Zacherie|   Kermon|zkermonhn@prnewsw...|  Male| 120.36.10.87|

Those are some of the functions that you can use with Datasets. There are still several Database table type operations on Datasets, like group By, aggregations, joins, etc. We’ll look at them in the next article on Spark as I think this article already has a lot of information already and I don’t want to overload you with information.

So, that is all for this article. If you’re someone that has never tried Datasets or Dataframes, I hope this article gave a good introduction on the topic to keep you interested in learning more.

The full code is available as gist.


For more Java, Apache Spark, Big data and other programming articles, checkout Freblogg, Freblogg/Java, Freblogg/Spark


This is the fifth article as part of my twitter challenge #30DaysOfBlogging. Twenty-five more articles on various topics including but not limited to Java, Git, Vim, Software Development, Python, to come.

If you are interested in this, make sure to follow me on Twitter @durgaswaroop. While you’re at it, Go ahead and subscribe to this blog and my blog on Medium as well.


If you are interested in contributing to any open source projects and haven’t found the right project or if you were unsure on how to begin, I would like to suggest my own project, Delorean which is a Distributed Version control system, built from scratch in scala. You can contribute not only in the form of code, but also with usage documentation and also by identifying any bugs in the functionality.


Thanks for reading. See you again in the next article.

December 25, 2017

Tweeting with Python and Tweepy

13:30 Posted by Freblogg , , , , , , , No comments

Programmers love to automate things and I'm no exception. I always like automate my common tasks. Whether it is checking for stock prices or checking to see when the next episode of my favorite show is coming, I've automated scripts for that. Today I am going to add one more thing in that list i.e., automated tweeting. I tweet quite frequently and I would love to have a way of automating this as well. And that's exactly what we're going to do today. We are tweeting using python.

twitter and python

We'll use a python library called tweepy for this. Tweepy is a simple, easy to use library for accessing Twitter API.

Accessing twitter API's programmatically is not only just an accessibility feature but can be of enormous value too. Mining the twitter verse data is one of the key steps in sentimental analysis. Twitter chat bots have also become quite popular now a days with hundreds and thousands of bot accounts. This article, although, only barely scratches the surface, hopefully will helping in building yourself towards that.

Setting Up

First thing's first, install tweepy by running pip install tweepy. The latest version at the time of the writing this article is 3.5.0.

Then we need to have our Twitter API credentials. Go to Twitter Apps. If you don't have any apps registered already, go ahead and click the Create New App button.

To register your app you have to provide the following three things

  1. Name of your application
  2. Description
  3. Your website url

There is one more option which is callback URL. You can ignore that for now. Then after reading the Twitter developer agreement (wink wink), click on Create your Twitter application button to create a new app.

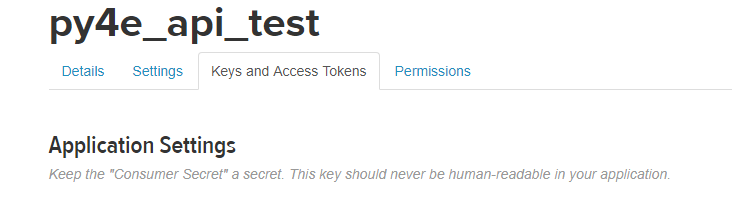
Once the app is created you should see that in your twitter apps page. Click on it and GOTO the Keys and Access Tokens tab.

twitter apps tabs

There you will see four pieces of information. First you have your app API keys which are consumer key and consumer secret. Then you have your access token and access token secret.

We'll need all of them to access twitter API's. So, have them ready. I have copied all of them and exported them as system variables. You could do the same or if you'd like, you can read them from a file as well.

Let's get started

First you have to import tweepy and os(only if you are accessing system variables).

import tweepy
import os

Then I'll populate the access variables by reading them environment variables.

consumer_key = os.environ["t_consumer_key"]
consumer_secret = os.environ["t_consumer_secret"]
access_token = os.environ["t_access_token"]
access_token_secret = os.environ["t_access_token_secret"]

With the keys ready, we setup the authorization.

authorization = tweepy.OAuthHandler(consumer_key, consumer_secret)
authorization.set_access_token(access_token, access_token_secret)

After authorization we create an API object twitter

twitter = tweepy.API(authorization)

And now you can tweet from python using this twitter object like this.

twitter.update_status("Tweet using #tweepy")

That is all you have to do. Just five lines of code and you can already tweet. You should try it out and check your twitter account. I just ran this command and this is the tweet.

Not just this, you can also tweet media. Let's tweet again, this time with a picture attached.

image = os.environ['USERPROFILE'] + "\\Pictures\\cubes.jpg"
twitter.update_with_media(image, "Tweet with media using #tweepy")

And this is the media tweet.

When you run the previous commands, you'll see that there is a lot of output that is printed on the terminal. This is a status object with a lot of useful data like the number of followers you got, your profile picture URL, your location etc., pretty much everything you get from your twitter page. We can make use of this information, If we are building something more comprehensive.

Apart from sending regular tweets, you can also reply to existing tweets. To reply to a tweet you'd first need its tweet_id which you can get from the tweet's URL.

For example the URL for previous tweet is https://twitter.com/durgaswaroop/status/945049796238118912 and the tweet_id is 945049796238118912.

Using that id, we can send another tweet as reply.

id_of_tweet_to_reply = "945049796238118912"
twitter.update_status("Reply to a tweet using #tweepy", in_reply_to_status_id=id_of_tweet_to_reply)

The only change in the syntax is in_reply_to_status_id=id_of_tweet_to_reply that is passed as the second argument. And with that our new tweet will be added as reply to the original tweet.

The new reply tweet is this:

That's how easy it is to access Twitter API with tweepy. We now know how to tweet and how to reply to a tweet. Building up from this knowledge, In a later tutorial, I can show you how to create your own twitter chat-bot and also twitter streaming analysis.

The full code of things covered in this article is available as gist at


For more programming and Python articles, checkout Freblogg and Freblogg/Python

Web Scraping For Beginner with Python


This is the third article as part of my twitter challenge #30DaysOfBlogging. Twenty-seven more articles on various topics including but not limited to Java, Git, Vim, Software Development, Python, to come.

If you are interested in this, make sure to follow me on Twitter @durgaswaroop. While you're at it, Go ahead and subscribe to this blog and my blog on Medium as well.


If you are interested in contributing to any open source projects and haven't found the right project or if you were unsure on how to begin, I would like to suggest my own project, Delorean which is a Distributed Version control system, built from scratch in scala. You can contribute not only in the form of code, but also with usage documentation and also by identifying any bugs in the functionality.


Thanks for reading. See you again in the next article.

August 12, 2017

Matrix Multiplication | C Programming

We have discussed about Matrix arithmetic in my recent youtube tutorial.


In that, I have already shown how Matrix addition and subtraction can be done and asked you to try multiplication themselves. Hopefully you have been able to do that Or atleast tried it out before coming here to see my solution.

For this example, I have taken two matrices as follows.


Matrix1 has 3 rows and 4 columns and Matrix2 has 4 rows and 3 columns. And now, the code to multiply these two matrices.
#include "stdio.h"
main() {

    int matrix1[3][4] = { {1,2,3,4}, {3,4,1,2}, {4,1,2,3} };
    int matrix2[4][3] = { {0,1,2}, {1,2,0}, {2,0,1}, {1,0,2} };
    
    // Values from the matrices. No. of columns in matrix1 = No. of rows in matrix2. Matrix Multiplication possible
    int rows1 = 3, cols1 = 4, rows2 = 4, cols2 = 3;        
    
    // Initialize the resultant matrix with all zeroes
    int mult_matrix[3][3] = {0};
    
    // Loop variables
    int i=0, j=0, k=0;
        
    for(i = 0; i < rows1; i++) {
        for(j = 0; j < cols2; j++) {
            for(k = 0; k < cols1; k++) {
                // Since we are initializing with zero, we can add new values to the previous value to get the final value
                mult_matrix[i][j] += matrix1[i][k] * matrix2[k][j];
            }
        }
    }
    
    //  Print the new matrix
    for(i = 0; i < rows1; i++) {
        for(j = 0; j < cols2; j++) {
            printf("%d ", mult_matrix[i][j]);
        }
        printf("\n");
    }
}

And when you run this program, you get the following output as one would expect:
12 5 13
8 11 11
8 6 16

Press any key to continue . . .
The comments, along with the explanation in the video should be enough for you to understand this code directly.But, do reach out on social media for any queries.

That's all for this article.
As, always, Have a happy reading and Stay Awesome !

If you have liked this article and would like to see more, subscribe to our Facebook and G+ pages.

Facebook page @ Facebook.com/freblogg

Google Plus Page @ Google.com/freblogg

October 16, 2015

How to use Aliases in Linux | Superuse your Terminal

14:18 Posted by Freblogg , , , , , , No comments
Well, let’s face it, Linux is cool. Using Linux makes you look cool. But, for new users, may be not so much. Typing those long  commands can be a little intimidating and may even scare them off.
Wouldn’t it be awesome if there was a way, so that you won’t have to type long commands? Or even better, to create your own new commands by which you can do a lot of stuff?
You are in luck, because Aliases help you with that and much more.
 

What are Aliases anyway? 
Alias, as the name suggests is an alternate form of a previously existing command(s). So basically you are creating your own custom command with which you can do a lot of functions.
Enough with the definitions, let’s see an example.
Say you want to go to the Desktop folder. You would have to do something like this,

 [dsp@freblogg]$:~ cd /home/dsp/Desktop
How about instead of  typing all that, you just say desk like this and it takes you to Desktop?

May 11, 2014

How to create Mail merge with Gmail and Google docs?

13:32 Posted by Freblogg , , 1 comment
Mail merge is a very interesting feature in every mail. And, being as popular as it is gmail supports this.
So, What is Mail merge?
Imagine you have a mail that needs to be sent to 50 of your friends/clients. One thing you can do is to add all the mail id's in the 'TO' field and send it.
This sure is one way to do it, but if you want to send a personalized message to each of them, probably something like, Hello Mr.A, for friend A and Hello Mr.B for B and so on. To be able to do this, you need to send the mails individually. Wouldn't it be easier if you can send this to all the persons at once?
Behold the Mail Merge man. He will make this task simple and easy. You just need to write a single mail and that will be sent to each of them with the corresponding personalization.

http://durgaswaroop.blogspot.in/2014/05/how-to-create-mail-merge-with-gmail-and.html

July 07, 2013

Keyboard Lights go DISCO | Cool Notepad Trick

16:05 Posted by Freblogg No comments
We all use keyboard for typing. But how many of you can play with your keyboard?
This is an interesting and fun way to make the LED's on your Keyboard blink in Disco Style. Caps Lock, Num Lock, Scroll Lock are the three LED's which we'll use for this program. With the following code we can make them blink rhythmically. This trick can be used as a prank to fool your friends. This is a small program written in Visual Basic. So, if you are familiar with VB you can tweak it a little or else you can just work with the program given below. 

STEPS:
1. Open Notepad on your computer
2. Copy the following code and paste in to the Notepad file
Set wshShell =wscript.CreateObject("WScript.Shell")
do
wscript.sleep 400
wshshell.sendkeys "{CAPSLOCK}"

May 11, 2013

How To Password Protect your Folders without using software

22:33 Posted by Unknown , 1 comment
Are you insecure of your privacy? Do you want to keep your secret files hidden from other people like your friends or brothers & sisters? Then here is an easy way to We are going to create password protected folder without using any software just using batch script file(.bat).
  • Decide where you want to have your PRIVATE folder first. It could be on your desktop or in your C Drive or somewhere else.
  • Now open 'Notepad' and copy the following code into it. 

Matrix Rain / Falling Matrix code : Notepad trick

17:46 Posted by Freblogg No comments
Have you watched the movie matrix? If you have watched it you would surely have noticed the green coded numbers running up and down (also called Matrix Rain) on the screen. In this That falling code trick is very easy to create on your own. Now, I'll show you how to do that.

STEPS TO GENERATE FALLING MATRIX CODE:
1)Open Notepad on your computer
2)Now, copy and paste the following code in to Notepad

May 08, 2013

How to Resize images easily

03:39 Posted by Freblogg , No comments
   Have you ever wondered  How to shrink the size of an image? How to re-size an image for my profile picture? Then this post is for you. Re-sizing an image is very useful these days either for sending it via emails or for posting it on your blog or for profile pictures in your social networking sites. So, here in this
post we'll show you how to re-size your images either a JPEG or PNG or GIF or BMP or other formats without having to install any new software and that too very easily using screen shots at each and every level.

May 04, 2013

How to download Youtube videos without any softwares

21:10 Posted by Freblogg No comments
    Does this ever happened to you that you like a you tube video so much and you want to download it so you can, may be watch it later or show it to someone else ? Well , you are in the right place. Now, we will show you an easy step by step way of how to do that ! Did I mention it's absolutely free ?


May 02, 2013

How To Add a Template to your blog

17:38 Posted by Freblogg , No comments
           Have you got a blogger template which looks awesome and you want your blog to look just like that ? That's what we'll show you in this tutorial. But before you upload a template file, you need to have one. So, if you already don't have one Google It and download a template. It downloads on to your computer as an XML file. Since you have a template now, Let's proceed with the tutorial.

Note: As always when ever you are going to upload a new template, it is always healthier to backup your current template, so that you can revert back if you don't like the new one. Just an advice for ya. Drop it or Take it. :)

Steps to Upload a template on to Blogger:


1)Open Your Blogger Dash Board and click on the 'TEMPLATE' button

April 26, 2013

How to add a FLYOUT menu to your blog

11:45 Posted by Unknown , , No comments
     Now that we have seen how to add drop down menu's to our blog...if you didn't ,go checkout that using the link provided. Sometimes we want menu on the left side like 'FLY OUT'  menu. So in this article we will show you how to add such fly out menu to our blog..

1) Open your Blogger dashboard click on the " TEMPLATE " button.

2) Now click on 'EDIT HTML' button beside 'Customize' button .

3)Now,click on Jump to widget on the top.

April 25, 2013

How To add an awesome DROP DOWN MENU BAR

21:05 Posted by Freblogg , , No comments
      Every body want to have their blog good looking. Drop down menu's are one of the very essential elements in this. These are very important because the first thing a user looks on your blog is the menu's. A Good and Beautiful Menu gives a good first impression for the viewer and makes him to come back to your blog again. So, here in this article we will show you how to add a beautiful and awesome looking drop down menu.Read the instructions carefully and add this Menu to your blog. Don't forget to share this article with your friends from the social tab on top.

April 24, 2013

How To Unlock Widgets In Blogger

13:46 Posted by Freblogg , , 4 comments
UNLOCK LOCKED WIDGETS
                 By default most of the widgets in Blogger are not locked , i.e., you can edit them by clicking on 'edit' and even remove them completely (if u want) from the 'LAYOUT' section. But You might have noticed some widgets like Navbar widget, Header widget, Attribution widget by default comes locked. So, You can't edit them directly. Here i'll show you how to UNLOCK them to make them editable and then you can do        what ever you want with them.Here is a easy step wise procedure to help you through till the end.

How To UNLOCK : 

1)Open Your Blogger Dash Board and click on the 'TEMPLATE' button

April 22, 2013

How to make Presentations online easily

22:02 Posted by Unknown No comments
Presentations Online Made Easy
   
Are you Thinking about giving an online presentation so that it will be available to world outside....then this post will help you.
    RVL.IO is the correct place to your presentations.It is just one way go after login. The various features it offers are....
  • Easy Editior

    The rvl.io editor easy to use. Presentation styles are applied to the slides even while you are editing them them so you'll know exactly what you're doing and what you are going to get as your final output.  
  • Writing and styling

    There's a wide variety of themes and transitions to choose from to make sure your presentation stands out from the rest and all the things move exactly in the you wanted them to.