Showing posts with label Linux. Show all posts

October 02, 2016

How to Exit Vim? | Your First Lesson In Vim

13:30 Posted by Freblogg , , , No comments

This is the second article in the series titled, "Your First Lesson In Vim". These articles are written with a goal of helping out new Vim users by teaching the awesomeness of the Vim editor and there by extending the Vim community. Vim though quite powerful, has a bad rep for being hard to learn and hard to get started with. So, even when someone is interested in learning about Vim, that infamous learning curve seem to be scaring them off. This series is going to put an end to all of that.

Vim Logo

In the last article Introduction & Installation we have seen why Vim is the best and coolest editor ever. Hopefully after watching Damian Conway's YouTube video given at the end of that article, you would agree. In this article we will experience Vim for the first time. We will learn about the various modes of operations in Vim. And, most importantly as the title of the article suggests, we will learn How to Exit Vim.

First thing's first, You have to open Vim, duh!. You can do that either by directly searching for Vim in your Search box or by typing vim in to your terminal. If you want to start off with gvim then open that instead. Your Gvim or Mac Vim would look something like this.
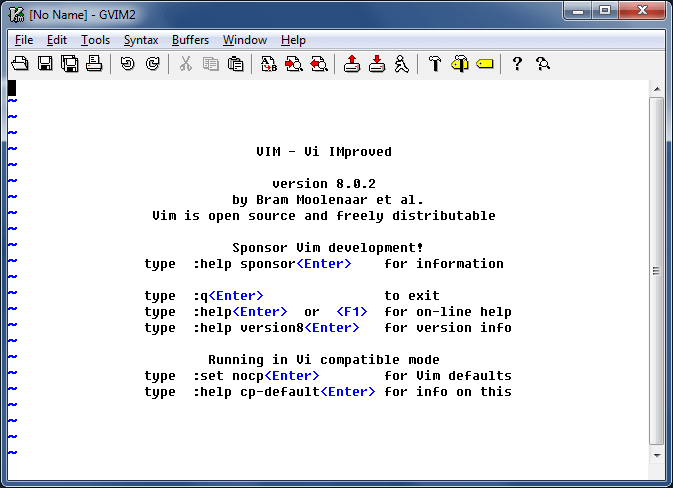
Gvim startup picture

If you have already tried to type something, you would observe that there is something shady going on here. For example, if you type hello world you might observe that only world is displayed and hello is no where to be seen. Try it out for yourself. This happens because of the infamous Vim modes. One of the first things you have to realize while using Vim is that its not like your typical run of the mill text editor. Vim works a bit differently and Modes is one of the key things that makes vim different. So, let's take a look at them.

Broadly speaking Vim has Four major modes of operation. That number keeps changing depending on who you're talking to because there are a few more modes that can technically be called sub-modes but some people insist on treating them as Seperate modes. But to keep things simple here 4 is the magic number for you and 4 is the answer to Life, Universe and Everything. Not 42, 4!

The modes are :

Normal Mode

Normal mode is the default mode you will be in when you open Vim. Normal mode is used for altering, deleting and formatting text. You won't be inserting any new text into the document in this mode. Normal Mode is the mode you will be spending most of your time in. You can get to Normal mode by pressing ESC from any other mode. One of the main things you will be doing in this mode is moving around your document.

To move around the file in the window you might usually be using arrow keys. In Vim they will work the way you expect them to, but instead vim advises to use h .. j .. k .. l for moving the cursor. The reason why this came to be and the advantages of this will be apparent in the next article but for now let's see how this works.

h moves the cursor left, l moves it right

j moves the cursor down, k moves it up

This following picture would make the idea clear.
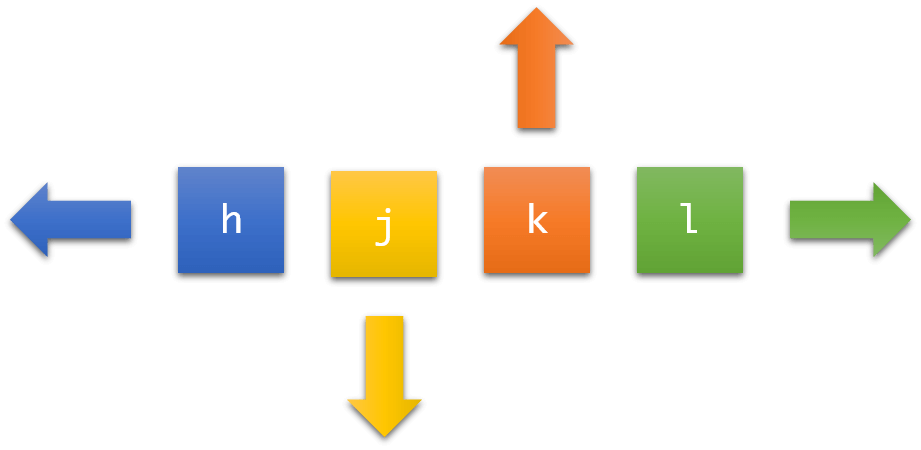
vim navigation

If you are thinking to stick with the arrow keys instead of h j k l, it is fine. There are a lot of people who use vim this way. But trust me when I say using h j k l speeds up you work flow a lot. Once you get used to this you wouldn't want to use arrow keys anymore. But anyway we will discuss more about the this in the next article.

Working in Normal mode, you will see how everything you do get's easy in Vim. For a quick sneak peak of some commands.

Command What it does?
dd delete the current line
yy Copy (yank) the current line
p paste the copied text below the current line
u Undo your previous change
gg Go to the beginning of the file
G Go to the end of the file

From now on you don't have to awkwardly select the full line with your mouse to delete it. All you have to do is press dd and that sucker goes away.

Didn't mean to delete it? No problem. Just hit u and it undoes the delete. No more holding down Ctrl and z. Alsou for undo is so simple to remember. What does Z even mean in Ctrl + z? And how did that become synonymous to Undo?

Similarly no more Ctrl + c and Ctrl + v to copy and paste. yy and p got you covered.

So you see, Vim sticks to its philosophy of making you productive. Imagine all the keystrokes you save per day, per year. So, switching to Vim doesn't just improve your productivity, it take care of your health too. With every Key you saved keeps you a key away from getting Carpel Tunnels and RSI. So, Use Vim - Stay healthy. :]

You might be happy with using Ctrl+c to copy and Ctrl+v to paste in your plain old editor. Its absolutely fine but Vim offers a simple and easy alternative and honestly the choice is pretty clear.

Anyways, that is about Normal mode for now. We will discuss more later when required. Let's look at Insert mode.

Insert Mode

As the name suggests Insert mode is where you will inserting text and that is all you will be doing in here. You enter Insert mode by pressing i in Normal mode . And in almost all Vim distributions you should see a noticeable change in the cursor right away. It would have changed from a block type cursor () to a I-beam (|). That's your indication that you're in Insert mode. In another tutorial we will see how you make that even more apparent. Whatever you type in Insert mode would be displayed on the file literally. If you type a b c, it types in those characters in to the file as you would expected. Contrast this from pressing dd in Normal mode which doesn't print them on the file but instead does something to the file (In this case, a delete operation).

Unlike other editors you wont be spending much time here and Infact I'd advise you to get out of Insert mode once you are done typing. To go out of Insert mode you just have to press Esc and you will be back in Normal Mode.

Now, Let's get to the fun part of insert mode. Remember before when I said you go from Normal mode to Insert mode by pressing i, well, It turns out it is just one of the ways to get in to Insert mode. There are five more ways in which you can enter Insert mode and you can choose the best one based on what you need. Sounds complicated? Let's list them down first.

Command Operation
i Enters Insert mode with the cursor placed before the current character
a Enters Insert mode with the cursor placed after the current character (Remember a - after)
o Enters Insert mode by opening a new line below the current line (Remember o - open)
I Enters Insert mode by placing the cursor at the beginning of the line (Remember big I - bigger version of i)
A Enters Insert mode by placing the cursor at the end of the line (Remember big A - bigger version of a)
O Enters Insert mode by opening a new line above the current line (Remember o - open)

As explained each one has a specific purpose.

If you want to quickly create a new line above the current line and start typing - You press O

If you want to insert a new line below the current line - You press o

To add something quickly at the end of a line - You press A

To add something at the beginning of a line - You press I

Could that be any more simpler? Surprisingly none of the other popular text editors do this. I can promise you that you won't be able to move so quickly in any other editor. This is Vim's power.

Let's look at another easy mode that will help you visualize things better, Enter Visual Mode.

Visual Mode

If you have carefully looked at things till now you might have started to feel that Vim favours Keyboard commands using a mouse. If you thought so, you would be absolutely correct. So, in the spirit of No Mouse, Visual mode tries to emulate Visual selections of your text similar to the way a mouse selects on Screen but instead with completely with the keyboard.

To enter in to Visual mode, just press v and move your cursor with either h j k l or the arrow keys and you will see that the text is getting highlighted indicating that it has been selected. Now, what can you do on this selected text? You can press d and delete it completely or you can press y and copy it. Notice that these are d and y and not dd and yy like in Normal mode. With v, Visual selection happens character by character. But if you want to select the full line, press V instead and you have the whole line highlighted and you can delete, copy or run any other command on the highlighted text.

This is how it looks like when you've something selected in Visual mode.
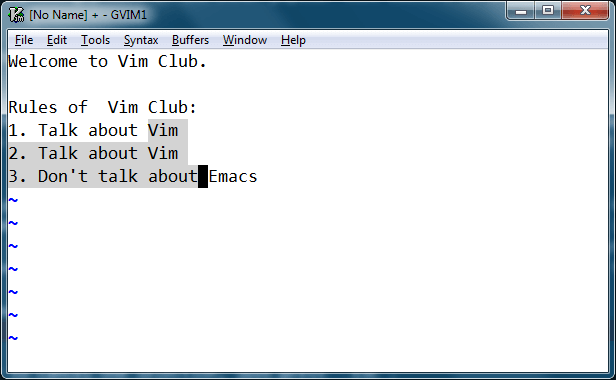
Vim visual mode selection

And to exit out of Visual mode or to cancel the selection, just press ESC.

Command Operation
v Visual selection by character
V Visual selection by line

We are finally down to the last mode, which is the Command mode (You don't take Command, Son)

Command Mode

Vim command mode is very powerful and one of the reasons why Vim is so versatile. Command mode is where you type Vim's commands, Vim configurations, Plugin settings, Open new files, close existing files and also access Vim's builtin help documentation. You enter to Command mode by typing : and then you type in the command you want. After you press : you will see the cursor at the bottom of the screen (called the last line appropriately) and you type the command.
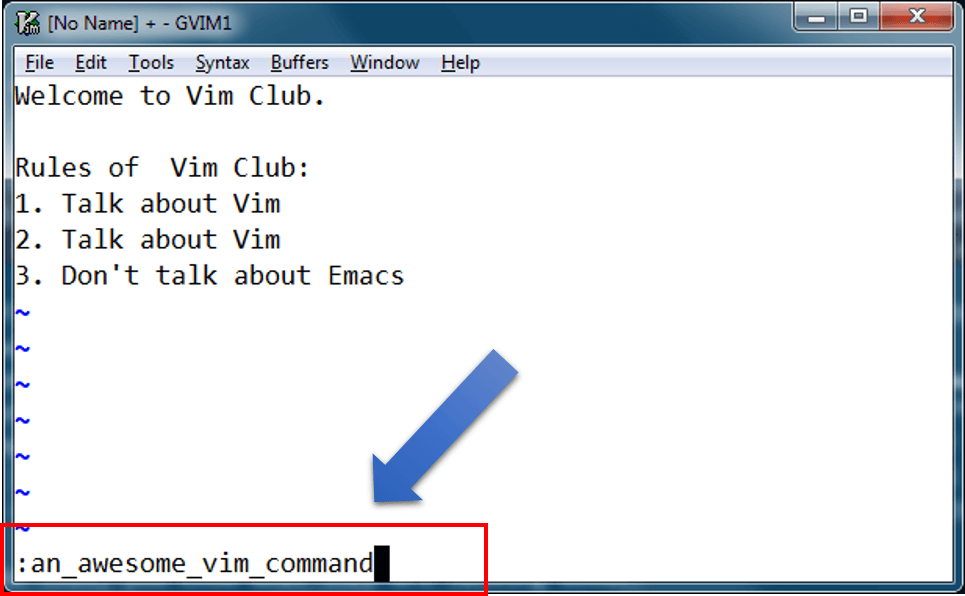
vim command mode example

To open a file, you type in :e file_name (:e is short for :edit)and hit Enter. If the file exists Vim will open it for you and if doesn't exist Vim will open blank file for you and the file will be created when you save it.

To save or rather to write the file to disk, you do :w and hit Enter for it to be saved. If the file doesn't yet have a name, You type :w file_name and it will save the contents of the window with that file name.

And Now for the most important question in all of Vim's History and the given title of this article, How to exit Vim! If you are using a Graphical version of Vim, then closing Vim is the same as closing the window and poof, its gone. But If you're using a terminal (works in gvim and macvim too) then you quit Vim by typing :q (short for :quit) and that closes the current window. If you have unsaved changes in your buffer Vim will give an error saying No Write Since Last Change. If you don't mind discarding unsaved changes, you append a ! and so the command becomes :q!. That is all there is about how you exit Vim. The bang(!) at the end is similar to -f or --force option in a lot of linux commands. It forces Vim to quit even when there are unsaved changes.

From now on if you ever saw a meme like this, you know what they are talking about.
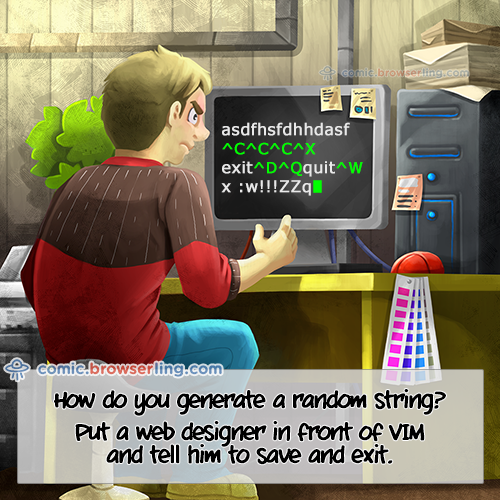
vim how to exit meme

Another important Vim command is :help. It contains the full help manual for Vim and so should be one of your most used commands in the initial days of learning.

And similar to other modes, you exit command mode by pressing the Esc key and you will be back in the Normal mode.

This image illustrates how you switch from one mode to another
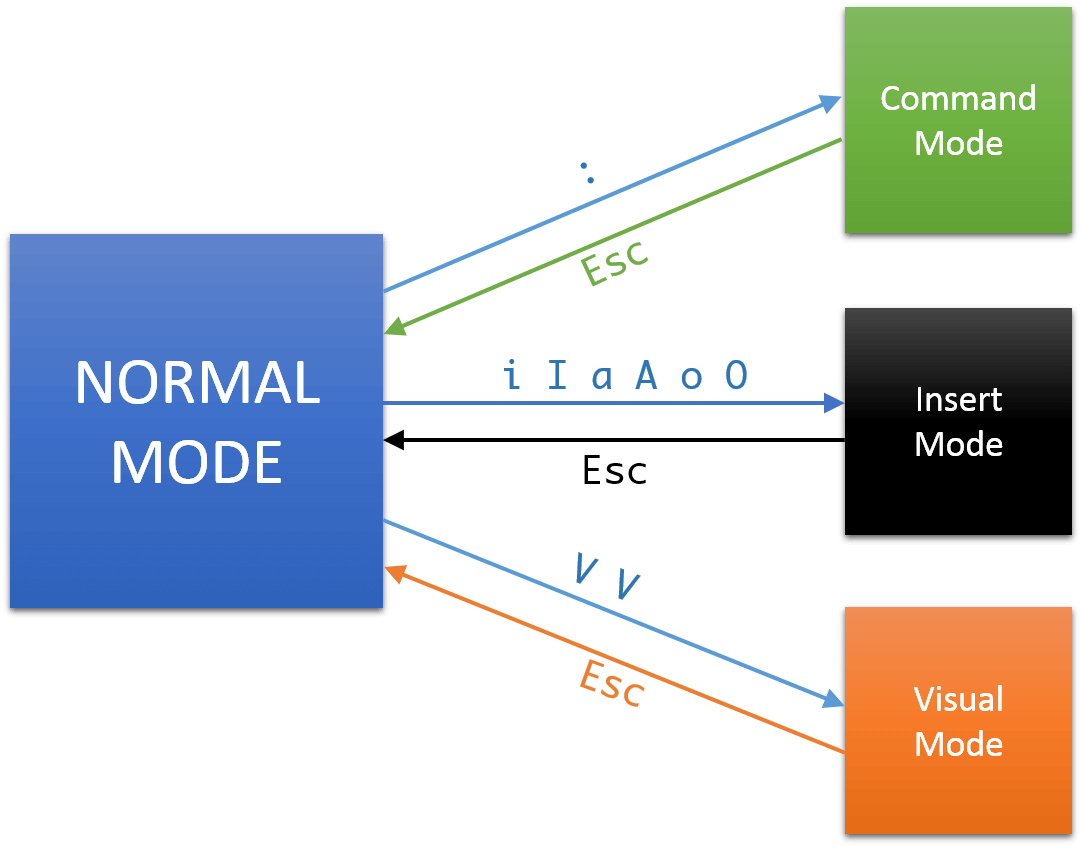
Vim_modes

Okay. That's a lot of information for one article. Let's do a quick review.

Story Recap

There are four modes of operations in Vim.

  • Normal Mode : moving around the document, deleting, copying, formatting are some of the common things you do in this mode
  • Insert Mode : Inserts text in to the document. Go into Insert mode by typing any one of a A i I o O in Normal mode. Come out with Esc
  • Visual Mode : For visually selecting the text. Enter with v or V and exit with Esc
  • Command Mode : To execute commands. :w to save, :help for documentation and :q to quit.

Well, That is all for this article folks. Will see you again in the next one. Until then, Keep practicing and Happy Vimming!

← Prev Next →


For more Vim stuff : vimtutorials.org

Follow FreBlogg on Facebook for more interesting articles.

Attributions:

Vim Logo - Vim Replacement Icon http://wolfrosch.com/works/goodies/vim (CC BY-NC-ND 3.0)

Vim Ninja image - https://goo.gl/QgTrsY (Originally from Practical Vim by Drew Neal)
September 24, 2016

Introduction & Installation | Your First Lesson In Vim

17:50 Posted by Freblogg , , , 1 comment

This is the first article in a series of articles titled, "Your First Lesson In Vim". These articles are written with a goal of helping out new Vim users by teaching the awesomeness of the Vim editor and there by extending the Vim community. Vim though quite powerful, has a bad rep for being hard to learn and hard to get started with. So, even when someone is interested in learning about Vim, that infamous learning curve seem to be scaring them off. This series is going to put an end to all of that.

Vim Logo

Warning : After going through all the articles in this series you will love Vim so much that you would like to have Vim style keyboard bindings everywhere, in your browser, in your mail client, in your shell and every other place which has a text input, which might not always be possible. So, Continue further at your own risk. YOU HAVE BEEN WARNED!

Vim is one of the best text editors available out there in the market. In fact it is one of the two best editors, the other being Emacs (This would be the last you'll see its name. From here on, it will be referred to as, The Editor which shall not be named ). Now you might be wondering, what about Sublime Text ? or Atom ? or some other flashy editor that's getting attention. My answer to that is very simple - East or West, Vim is the best. Don't get me wrong, editors like Sublime, Atom are good and I was a fan of Sublime myself. But to be called the best, a Text Editor needs to customizable, extensible and most importantly should have a huge community of users helping out each other. None of these editors can beat Vim in those areas. Apart from that Vim is really fast and robust. It can open huge files that makes other editors crash. It has builtin syntax support for hundred's of file types. It has a huge plugin base that both extend vim's functionality and add more functionality to do pretty much any thing you want. And that's just a few reasons why its the best.

Since you are reading this article, I assume that you're interested in learning about what Vim is and about what Vim does. So, Let's start with some brief history of how the Vim editor came to be.

  • In 1970's, Bill Joy developed ex editor for Unix which later came to be known as the Vi editor for having a Visual interface for editing.
  • 1987 - Stevie was developed as a clone of Vi for Atari ST systems. Stevie stands for 'ST Editor for Vi Enthusiasts'. The name might be a mouthful but the editor itself is quite popular.
  • 1988 - Vim (Vi IMitation) was created by Bram Moolenaar (Remember the name ..) as a port of Stevie for AmigaOS. Though started as an imitation, Vim quickly started to add several new features with support for multiple operating systems.
  • 1993 - Vim 2.0 released with name changed to 'Vi IMproved' because, by then Vim had a lot more features than original Vi.

    .

    . Fast forwarding history

    .

  • 2006 - Vim 7.0 released with support for tabs, code completion, undo branching and a lot more
  • 2016 - Vim 8.0 released with a lot of exciting features like Asynchronous I/O, channels, Jobs, Timers, Packages and a lot more

(Shout out to buildingvts.com for putting this history together)

So, as you can see from our brief Time travel, Vim has been around for almost 30 years. Now you might be asking yourself, why the heck is this editor still used today after almost 30 years. That's a good question and one that needs to answered right now.

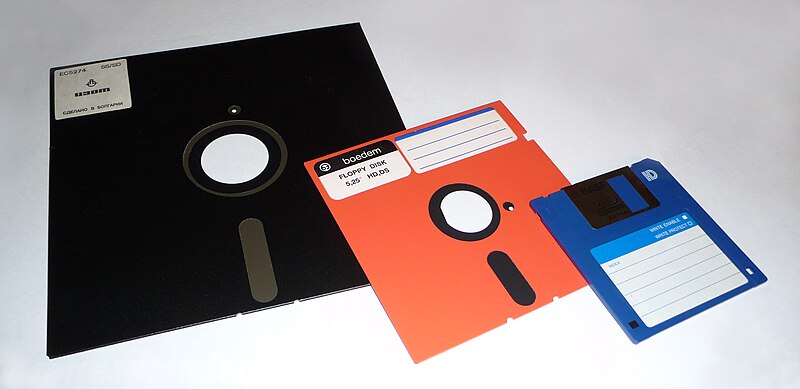
Floppy disks

Technology sure changes a lot and old things usually tend to get lost with all the new things that keep coming. But in the case of Vim or The Editor which shall not be named, that is simply not the case. They fall in to the category of "Old is Gold". These editors are written during the days when floppy disks and magnetic tapes were all the rage and hence are written to be memory efficient. Though Vim has changed a lot over the years to add countless new features, the fundamental idea of being light weight and memory efficient is still one of its big selling points. That is the reason why Vim managed to stay relevant through three decades and that is also the reason why it will continue to be relevant for more decades to come.

So, If that answer convinced you to stay the course and explore the exciting and enticing world of Vim, then Welcome aboard! Make sure to remember that this is the day you have decided to take your text editing to the next level by learning Vim.

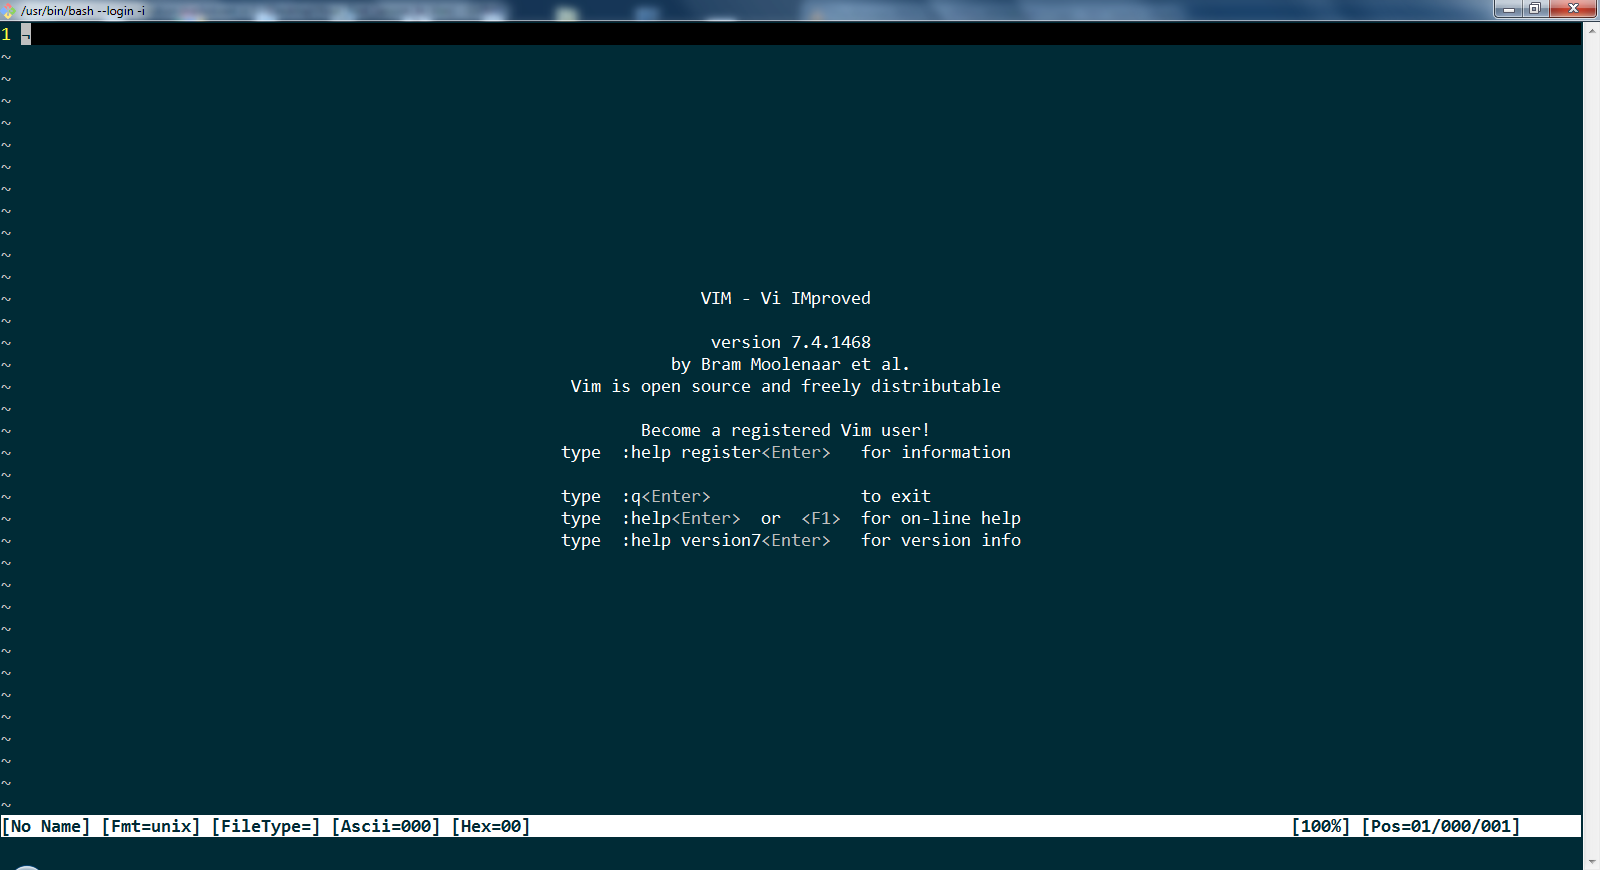
Now that we know the history of Vim, its time to install Vim on your Computers. If you are rocking a Linux Operating system, chances are you already have a version of Vim pre-installed. So, check if it exists by typing vi or vim in the command line. If it is available, you should see a screen that looks something like this.

Vim start screen image here

If you see this then Vim is already installed.

If you don't have it installed, don't worry. Vim is a freeware (correction: Charity ware) and so you can download it for free from Vim's official site Vim.org. Vim is available for pretty much every major Operating system out there. I heard that there is a version of Vim available even for Toasters. I have no idea who might use that, but its there if you need it. And this is another reason why people like vim so much.No matter the OS, they can be sure that their favorite editor is available. So, Just download vim for your operating system and install it.

And by the way, did I mention that Vim is primarily a terminal based program? It was initially designed to be run in terminals to access files on remote systems. A lot of people to this day, prefer the terminal version of Vim. But to those of you who like to have a Graphical User Interface (GUI) you've that available as well.

For windows users, it can be downloaded from the vim.org site. Look for Gvim (stands for Graphical Vim) For mac users, you can download Mac Vim which provides a good GUI experience. For Linux users, there are Gvim versions available for most of the distros. So, download the one suitable for your distribution.

If you have successfully installed Vim on your systems open Vim either in Terminal or the GUI and you should see a welcome screen similar to the picture above. If you got that, then Congratulations, you have the power of Vim with you now.

Don't forget what Uncle Ben said, "With great power comes, great responsibility". So, your responsibility as a Vim user is to spread the vim awesomeness with your co-workers and friends. It would be even better if you can share this article with them but that is entirely up to you. (Jedi mind tricks working implicitly)

And before we finish this article I will give you a sneak peak at the power of Vim and what you can do with it. Watch Damian Conway's Video on Vim : More Instantly better Vim. Conway is one of the Vim geniuses whom I admire a lot. This video gives you a small window in to the world of Vim and what Vim can do in the hands of a seasoned user. You might not be able to understand understand how Conway is doing his magic but that is entirely fine. You obviously won't be able to understand Linux Kernel module code right when you're starting to write Hello World programs. This video is just to show you how the masters use Vim and you will be able to do that too once you've mastered it.

Well, That is all for this article folks. Will see you again in the next one. Until then, Keep practicing and Happy Vimming!

Next →


For more Vim stuff : vimtutorials.org

Follow FreBlogg on Facebook for more interesting articles.

Attributions:

Vim Logo - Vim Replacement Icon http://wolfrosch.com/works/goodies/vim (CC BY-NC-ND 3.0)

Floppy Disks - https://goo.gl/0Ns2Dj

June 18, 2016

Quick Vim Tips

23:29 Posted by Freblogg , , , , No comments
freblogg-vim-image
Vim is one of the most powerful text editors available. And, hence it is not really possible for everyone to know everything or get the same ideas on improving their work experience. And, so this article includes a few tips and handy shortcuts that will help your productivity just as we have been doing in the Vim series, but individually not extensive enough to get their own dedicated article.

So, here are some useful tips for Vim

RegEx : The Right Way | * and + operators

23:22 Posted by Freblogg , , , , , No comments
Till now we have covered the Dot Operator and the ? Operator for optional characters. To see all the articles of this Regular Expressions series, click here .
In this lesson we are going to see how to match multiple characters at once. The number of characters can be anything. And, the * and + operators are going to help us with that.

Vim Splits | Multitasking made easier

23:12 Posted by Freblogg , , , No comments
A lot of Programmers use Vim in some way or another but a vast majority of them use only a handful of features. Knowing to use Splits, tabs, macros and marks can really increase your productivity. Through this and the upcoming articles on Vim I will try to cover the important things that make Vim so awesome.
Splitting your Screen
Vim Splits is a very powerful way of keeping your workflow organized. You can use splits (windows or view-ports in Vim vernacular) to get a different view in to the same file or open a different file to see a quick diff .

Using Xargs | Superuse your Terminal

23:07 Posted by Freblogg , , , , No comments
Xargs is one of the really useful Linux commands that every one should know about. It is a great command that simplifies your task at hand and overall, a  great command to  have in your arsenal. And, its quite simple to use.


So, What is xargs?
Xargs is a command that helps you run a command on a series of things in order.  The easiest way to understand this is by looking at an example. Before, that here is the typical command structure when you use xargs.

<Some Input generator> | ... | xargs <command to run>

RegEx : The Right Way | Optional Characters?

22:54 Posted by Freblogg , , , , No comments
We have already seen how to use the dot operator in Regular Expressions in the last tutorial (Link). To see all the articles of this Regular Expressions series, click here .
In this lesson, we will see what to do when some characters you want to match are optional, i.e., if they are present, match them and if they are not, don't bother.
So, Imagine a situation where you want to match foo and foobar. Hence, bar is optional. Then, what do we do to match and identify such words? Let's see ...

RegEx : The Right Way | Dot Operator

22:48 Posted by Freblogg , , , , , , No comments
Let's continue with Regular Expressions. All articles in this series can be found here. I will be using Regexr.com for most of these tutorials. It is a great site, where you can write and validate your regular expressions against your desired input text.
Now, Let's look at how regular expressions usually look like..

Bash Keyboard Shortcuts | ReadLine Tips

22:43 Posted by Freblogg , , , , No comments
Read Line is a editor every body uses but no one knows about. If you have used Linux for anything before, you have used ReadLine. Doesn't ring any bells? Well, that is because, not a lot of people call it that. It is more frequently termed as the "Bash Prompt" or something along those lines.
dsp@freblogg:$ |
So, this prompt you see every time you open a terminal, has got a name. Its called ReadLine. A really lax name, isn't it?  No wonder it didn't catch on.
So anyway, here are a few keyboard shortcuts to help you type efficiently in ReadLine and become a Con-fu master!

RegEx : The Right Way |Tutorial 1

Regular Expressions or RegEx is  a sequence of characters that define a search pattern. Regex is every where these days and you can use it to extract information from Text files, Log files, Dictionaries, Spread sheets and even webpages. Every major programming language has support for Regular Expressions. Most importantly grep, awk and  sed use regex to find/replace matches.
Regular Expressions can help you save a lot of time. Instead of writing complex String pattern searches which span over multiple lines, regex gets the job done really easily and really fast.

Your very own Vim file tree | NERDTree

22:30 Posted by Freblogg , , , , No comments
NERDTree is a real time saver and a pretty cool extension to your Vim setup, to make it more user friendly. Almost every other Text editor out there comes with an ability to show the file directory listing in which the current file is present. And, if you are wondering how you can do the same in Vim, then look no further because NERDTree is what you want.

So, what does it do?
It just shows all the files, folders in the current working directory. Also, you can add,delete files right from the list. That's pretty cool.
So, take a look,

October 16, 2015

How to use Aliases in Linux | Superuse your Terminal

14:18 Posted by Freblogg , , , , , , No comments
Well, let’s face it, Linux is cool. Using Linux makes you look cool. But, for new users, may be not so much. Typing those long  commands can be a little intimidating and may even scare them off.
Wouldn’t it be awesome if there was a way, so that you won’t have to type long commands? Or even better, to create your own new commands by which you can do a lot of stuff?
You are in luck, because Aliases help you with that and much more.
 

What are Aliases anyway? 
Alias, as the name suggests is an alternate form of a previously existing command(s). So basically you are creating your own custom command with which you can do a lot of functions.
Enough with the definitions, let’s see an example.
Say you want to go to the Desktop folder. You would have to do something like this,

 [dsp@freblogg]$:~ cd /home/dsp/Desktop
How about instead of  typing all that, you just say desk like this and it takes you to Desktop?